


Introduction
When diving into the world of building APIs, you're setting yourself up to create some seriously scalable and maintainable web services.
And guess what makes the journey even more exciting?
The treasure trove of extensions is available in Visual Studio Code (VS Code).
It's like having a Swiss Army knife for development - these extensions are game changers. They don't just make your workflow smoother; they amp up your testing game and make sure your API documentation is not short of top-notch.
In this post, let's walk through four VS Code extensions I believe are absolute must-haves for any API developer.
Trust me, you'll want these tools in your toolkit.
Prerequisites
Before we jump into the exciting world of extensions that will supercharge your API development, let's get the basics squared away.
We'll focus on crafting APIs using .NET WebAPI, specifically with the C# programming language. It's a powerful combo that enables you to build scalable, maintainable web services with ease.
Here’s what you need to get started:
- Visual Studio Code: Make sure you have the latest version of VS Code installed. It's going to be our main workspace where all the magic happens. You can download it from: https://code.visualstudio.com/download
- .NET SDK: Essential for any .NET development, this SDK is a must-have on your machine. We'll be using it to develop our .NET WebAPI applications in C#. Download the latest stable version here: https://dotnet.microsoft.com/en-us/download/visual-studio-sdks
- C# Extension for VS Code: To be able to run our .NET API Project, we should add a C# extension.
Steps you need to follow:
Step 1: Open Visual Studio Code
Step 2: Access the Extensions View - Once VS Code is open, look for the Extensions view by clicking on the square icon on the sidebar, or you can simply press Ctrl+Shift+X on Windows/Linux or Cmd+Shift+X on macOS to open it.
Step 3: Search for the C# extension - In the Extensions view, there’s a search bar at the top. Type “C#” into this search bar. You’ll be looking for the C# extension by Microsoft, which is specifically designed for .NET development including C#.
Step 4: Install the extension: Locate the C# extension by Microsoft in the search results. It should be one of the first options displayed. Click on the green Install button associated with the extension. Visual Studio Code will handle the installation process for you.
With these key elements in place, we're ready to dive into the world of VS Code extensions that are going to elevate your .NET WebAPI projects.
Setup
As I said, we will work with the .NET WebAPI project which brings WeatherForecastController.cs by default when you create a web API project.
using Microsoft.AspNetCore.Mvc;

namespace BasicApi.Controllers;

[ApiController]
[Route("[controller]")]

public class WeatherForecastController : ControllerBase

{

    private static readonly string[] Summaries = new[] {
      "Freezing", "Bracing", "Chilly", "Cool", "Mild",
      "Warm", "Balmy", "Hot", "Sweltering", "Scorching"
    };

private readonly ILogger _logger;

public WeatherForecastController(ILogger logger) { _logger = logger; }

[HttpGet(Name = "GetWeatherForecast")]

public IEnumerable Get() {
  return Enumerable.Range(1, 5).Select(index => new WeatherForecast {
         Date = DateOnly.FromDateTime(DateTime.Now.AddDays(index)),
         TemperatureC = Random.Shared.Next(-20, 55),
         Summary = Summaries[Random.Shared.Next(Summaries.Length)]
   })
   .ToArray();
 }
}
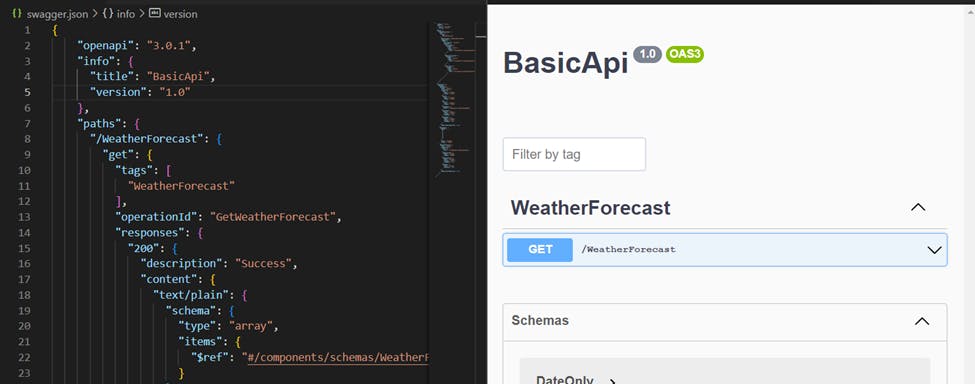
If you run the application by calling the dotnet run command in the Terminal, you can see the web presentation (via Swagger documentation) of the endpoints:
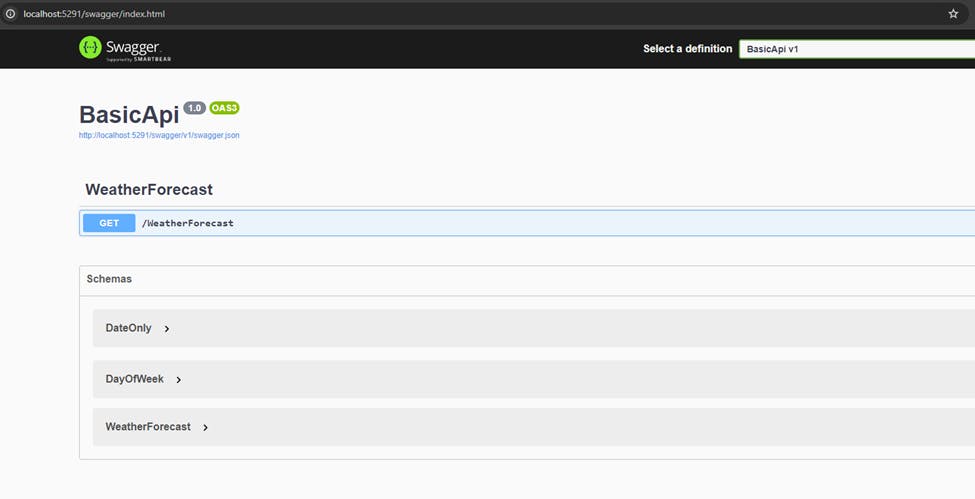
We are ready. Let’s explore some extensions!
Extension 1: REST Client
The REST Client extension for Visual Studio Code provides a unique and powerful way to test HTTP requests directly within your editor, without the need for a separate application like Postman or cURL.
Check it here: https://marketplace.visualstudio.com/items?itemName=humao.rest-client
This feature can be incredibly beneficial for developers working on APIs, including those using .NET WebAPI in C#.
Here’s a more detailed look at what REST Client offers and how you can leverage it in your development process.
Features and Capabilities
- Direct Execution of HTTP Requests: REST Client allows you to write and send HTTP requests directly from VS Code. You can create files (with extensions like .http or .rest) where you can define requests using simple HTTP syntax. This includes specifying the method (GET, POST, PUT, DELETE, etc.), URL, headers, and body content.
- Rich Response Viewing: The extension presents responses in a well-structured format within VS Code. You can see status codes, response headers, and body. It supports viewing responses in different formats, including JSON, XML, and HTML, with syntax highlighting and formatting that make them easier to read and understand.
- Variables and Environment Support: REST Client supports variables, allowing you to define environment-specific values (such as API base URLs or authorization tokens) and reuse them across multiple requests. This is particularly useful for switching between different development, testing, and production environments.
- Request History and Favorites: You can easily access your history of sent requests and mark frequently used requests as favorites for quicker access. This feature enhances workflow efficiency by reducing the need to rewrite frequently used requests.
- Scripting and Tests: While REST Client primarily focuses on sending requests and viewing responses, it supports basic testing features through response validation scripts. You can write simple JavaScript to validate responses, ensuring that your API behaves as expected.
How to Use a REST Client
Install the Extension: First, ensure that the REST Client is installed in your Visual Studio Code setup.
Create a Request File: Create a new file with a .http or .rest extension. This file will contain your HTTP requests.
Write Your HTTP Request:
- Start with the HTTP method (e.g., GET, POST) followed by the URL
- Add headers, if necessary, each on a new line, starting with Content-Type: application/json for JSON payloads.
- If your request includes a body (like in POST requests), separate it from the headers with an empty line and include the JSON, XML, or any other payload.
Example of a simple GET request in our case:
GET localhost:5291/WeatherForecast
- Send the Request: Place your cursor over the request line or right-click on the request line and click the "Send Request" link that appears above it. The response will be shown in a pane to the right of your request.
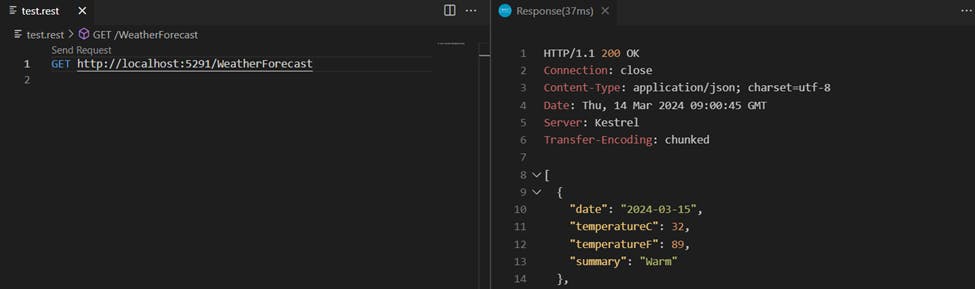
- Review the Response: Analyze the status code, headers, and response body directly within VS Code.
Extension 2: API-Insights (by Treblle)
API Insights is a transformative tool available for free on Visual Studio Marketplace, designed to enhance API development and comparison processes.
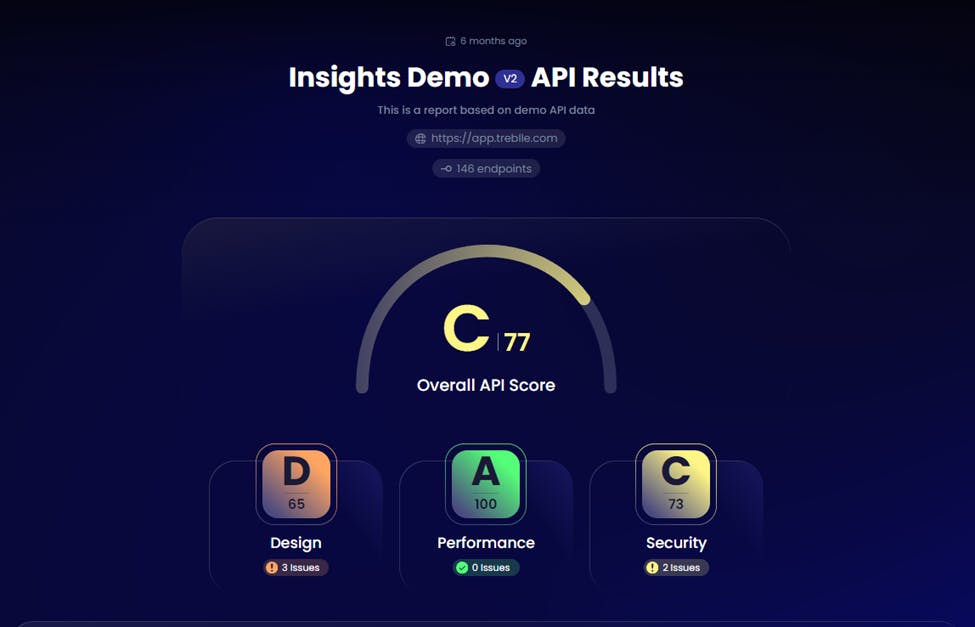
It offers a unique scoring system that evaluates API quality across various metrics, ensuring that developers maintain high standards during the development phase. Additionally, it facilitates the comparison of APIs within the same industry, allowing for insightful competitive analysis.
This tool is particularly useful for developers looking to monitor their API's performance, security, and overall quality, as well as those interested in comparing their APIs with competitors to identify areas of improvement.
For a detailed overview and to explore its features, visit the Visual Studio Marketplace.
Features and Capabilities
API Insights stands out as a no-cost, essential tool for real-time API management and competitive analysis during development.
It ensures developers stay on track, despite any distractions, by monitoring changes to the API specification.
This tool is pivotal for maintaining governance over API development, highlighting areas for improvement across:
Quality
Security
Performance.
Unlike other tools that offer superficial insights, API Insights provides actionable feedback, guiding developers toward enhancements in their API projects.
How to Use API Insights
Treblle explained this very well in the walkthrough they offer, so I'll use that explanation.
- Walkthrough:
In the walkthrough, they will provide you with a sample file and guide you step by step on how to get your first report.
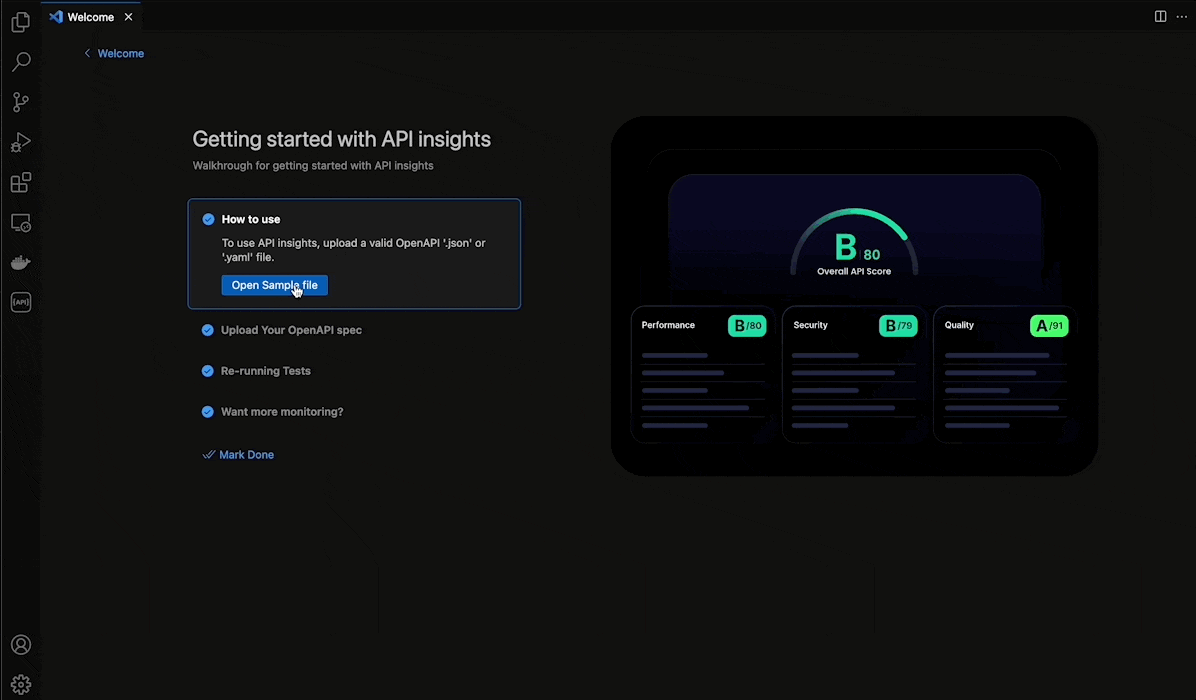
- Select a file from the workspace
Once you have your OpenAPI spec file in the workspace, you can select it and it will be immediately checked.
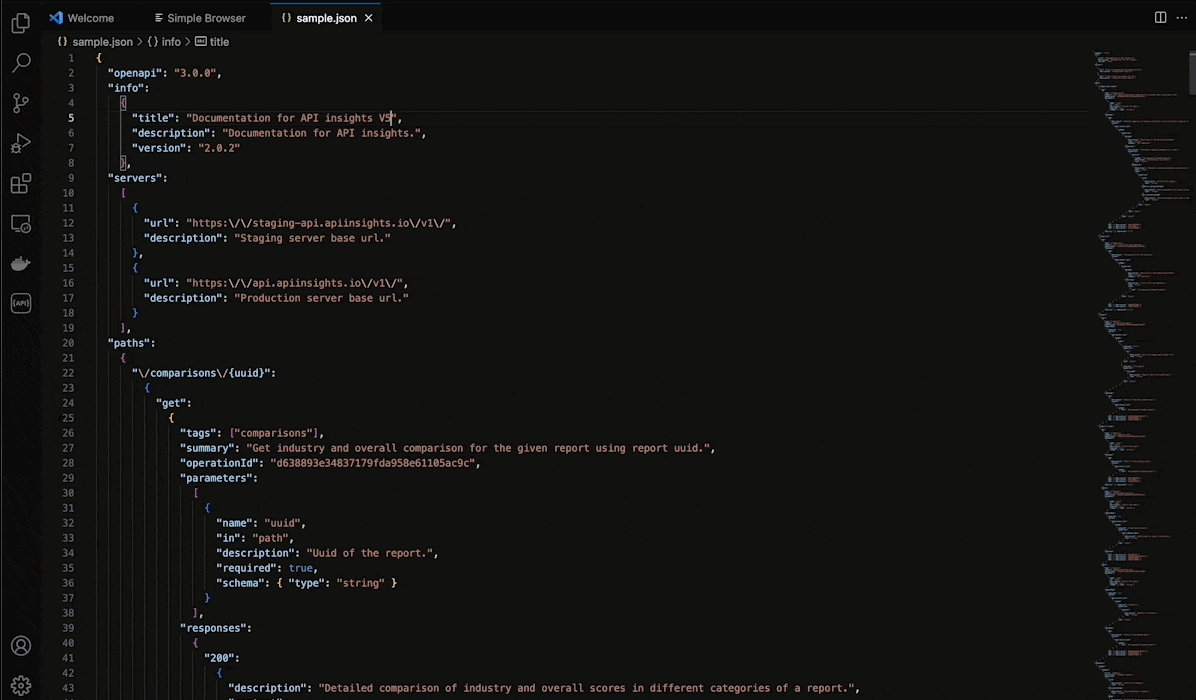
Note: API Insights uses the OpenAPI specification to analyze APIs. That means you should have a .json specification of your API. The easiest way to achieve this in our example is to use the generated swagger.json file located at the address (in our case): localhost:5291/swagger/v1/swagger.json.
- On file change, you can re-check for a new score
Extension will track file changes, and they will show you a prompt to re-check your score. This can be very convenient because you don't have to reload the file at any time.
This is my favorite feature.
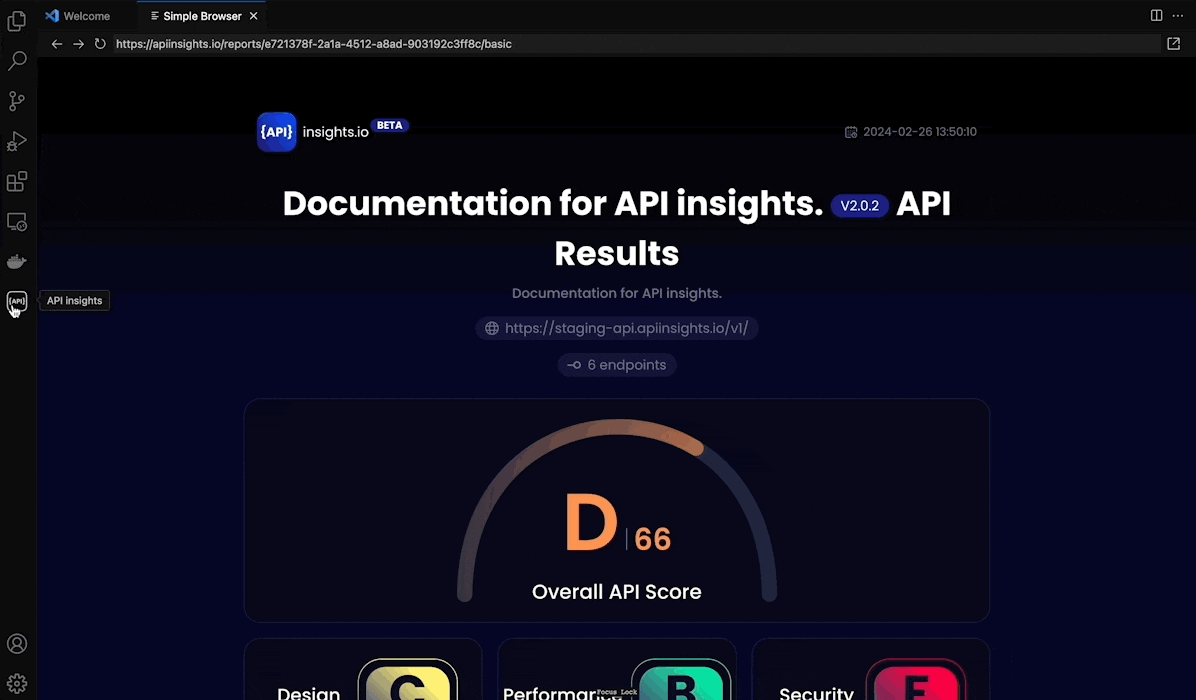
- Open in the browser to use the comparison feature
If you would like to know how you compare it to the industry, you can open the report in the browser and select industry at the bottom. Once the score is computed, it will be shown automatically.
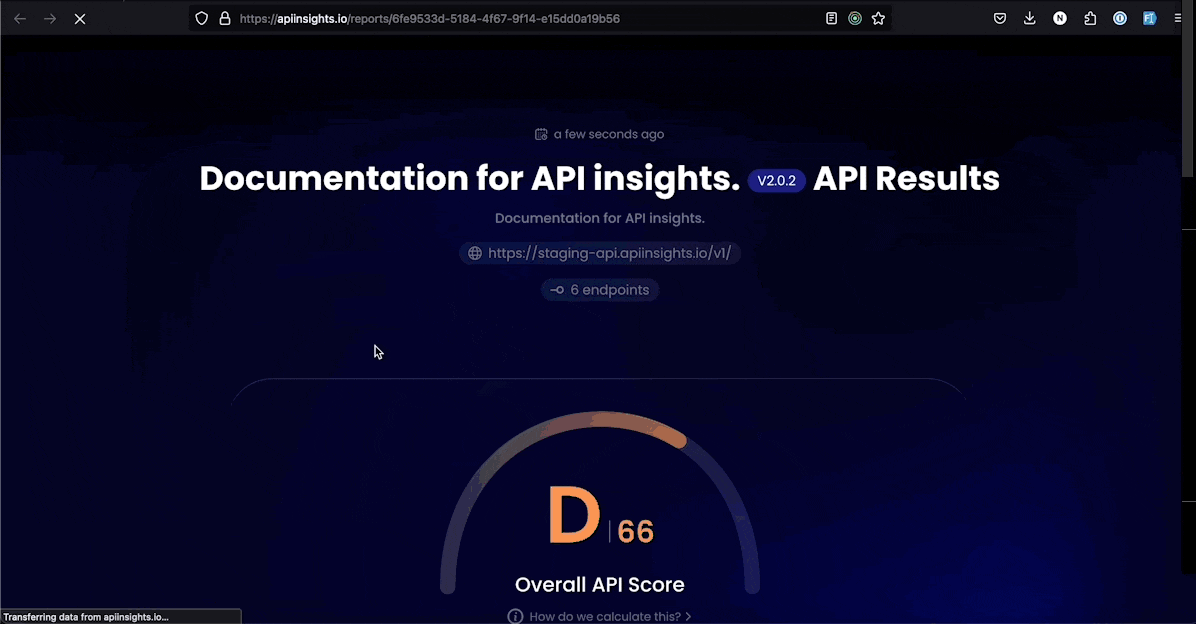
It looks like this in a web browser:
Note: The API-Insights extension derives from the original feature that was primarily created as a web application and can be seen here: https://apiinsights.io/
This is handy if you don't want to install the extension.
But my recommendation is to install the extension because at any moment API Insights are at your fingertips.
And yes, API-Insights has become my default go-to tool in VS Code when building APIs.
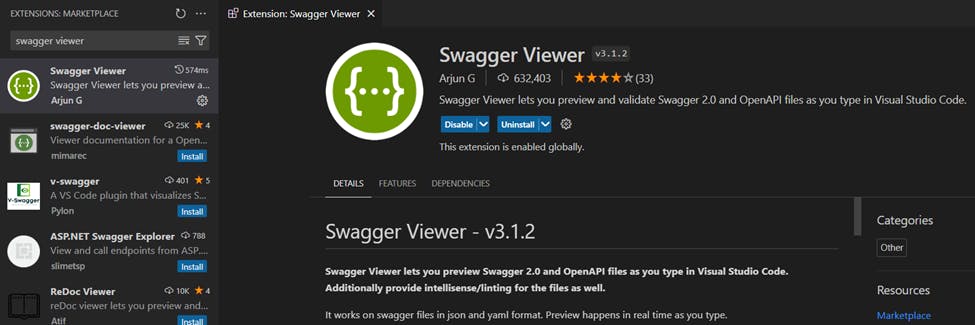
Extension 3: Swagger Viewer
The Swagger Viewer extension for Visual Studio Code is an invaluable tool for developers working with APIs, particularly those using the OpenAPI Specification (Swagger) to document their APIs.
It allows you to view and interact with your API documentation directly within VS Code, offering a real-time preview of how your API documentation looks and behaves in the Swagger UI.
Check it here: https://marketplace.visualstudio.com/items?itemName=Arjun.swagger-viewer
This immediate feedback can dramatically improve the documentation process, ensuring your API is well-understood by both developers and stakeholders.
Here’s a deeper dive into what Swagger Viewer offers and how it can enhance your .NET WebAPI projects.
Features and Capabilities
- Real-time Preview: Swagger Viewer automatically renders your Swagger (OpenAPI) documents as an interactive API documentation page. This live preview updates as you edit your Swagger file, providing immediate visual feedback on your documentation's appearance and functionality.
- Syntax Highlighting and Validation: The extension supports syntax highlighting for Swagger files, making them easier to read and edit. It also validates your Swagger documentation against the OpenAPI specification, highlighting errors and warnings that can help you identify and fix issues quickly.
- Interactive Documentation: The rendered documentation is interactive, meaning you can test API calls directly from the Swagger UI preview. This feature allows you to ensure that your API behaves as expected and that the documentation accurately reflects the API's functionality.
- Support for Swagger 2.0 and OpenAPI 3.0: Swagger Viewer supports both Swagger 2.0 and OpenAPI 3.0 specifications, covering a wide range of API documentation needs. This compatibility ensures that you can use the extension regardless of which version of the specification your project adheres to.
How to Use Swagger Viewer
- Install the Extension: Make sure that Swagger Viewer is installed in your Visual Studio Code.
Open Your Swagger File: Open the Swagger (OpenAPI) YAML or JSON file in VS Code. You can use the swagger file we created earlier. This file contains your API documentation, detailing endpoints, parameters, responses, and other important information about your API.
Preview Your Documentation: To preview your documentation, you can use the command palette (Ctrl+Shift+P on Windows/Linux, Cmd+Shift+P on macOS) and type "Open Preview".
Alternatively, some versions of the extension might allow you to right-click on the Swagger file and select "Preview Swagger" from the context menu.
The Swagger UI preview will open in a side pane or a new tab within VS Code, rendering your API documentation as it would appear in the Swagger UI.
Edit and Validate: As you make changes to your Swagger file, the preview will update in real time. Pay attention to any syntax highlighting or validation messages that appear, as these can guide you in correcting errors and improving your documentation.
Test Your API: Utilize the interactive features of the Swagger UI preview to test your API endpoints directly from the documentation. This step is crucial for verifying that your documentation accurately represents how your API functions.
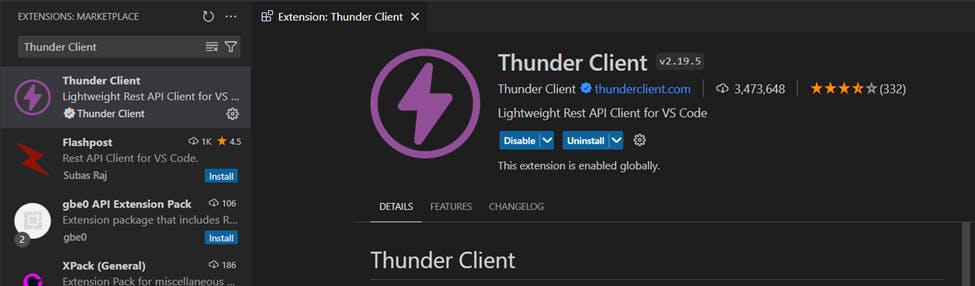
Extension 4: Thunder Client
Thunder Client is a lightweight, GUI-based REST API Client built directly into Visual Studio Code, designed to make API testing and documentation a breeze.
It strikes a balance between the simplicity of sending HTTP requests and the depth of features for comprehensive API testing, all from within the comfortable confines of VS Code. Check it here: https://marketplace.visualstudio.com/items?itemName=rangav.vscode-thunder-client
This integration makes it an attractive tool for developers working with .NET WebAPI or any other web services, who prefer not to switch between their code editor and a separate application for API testing.
Here’s what Thunder Client brings to the table and how you can use it to streamline your API development workflow.
Features and Capabilities
- Intuitive User Interface: Thunder Client boasts a user-friendly interface that makes setting up and executing HTTP requests straightforward. Its simplicity is one of its strongest features, appealing to both seasoned developers and those new to API testing.
- Comprehensive HTTP Request Support: Whether you're dealing with GET, POST, PUT, DELETE, or any other HTTP method, Thunder Client has got you covered. It allows you to easily add headers, query parameters, and body content to your requests.
- Response Viewing and Analysis: After sending a request, you can view detailed responses, including status codes, headers, and the response body. Thunder Client supports syntax highlighting for JSON, XML, and HTML responses, making it easier to analyze the data.
- Environment and Variable Management: To facilitate testing across different stages of development, Thunder Client supports environment variables. You can define variables for different environments (e.g., development, staging, production) and quickly switch between them.
- Testing and Assertions: Beyond simple requests and responses, Thunder Client offers basic testing features. You can add tests to your requests to validate response data, status codes, or response times, helping ensure your API behaves as expected.
- Request Collection and Sharing: Organize your API requests into collections, making them easier to manage and share with your team. This feature is particularly useful for collaborative projects and API documentation purposes. This is my favorite one.
How to Use Thunder Client
- Install Thunder Client: First, ensure Thunder Client is installed from the VS Code Marketplace.
Open Thunder Client: Click on the Thunder Client icon in the VS Code activity bar to open the client. You'll be greeted with a straightforward interface for managing requests and collections.
Create and Configure a Request:
- Start by clicking the “New Request” button. This opens a tab where you can configure your request.
- Select the HTTP method and enter the URL of your API endpoint.
- If needed, add headers (e.g., Content-Type, Authorization) and query parameters via the respective tabs.
- For methods like POST or PUT, you can add body content in various formats, including raw JSON, form data, or binary data.
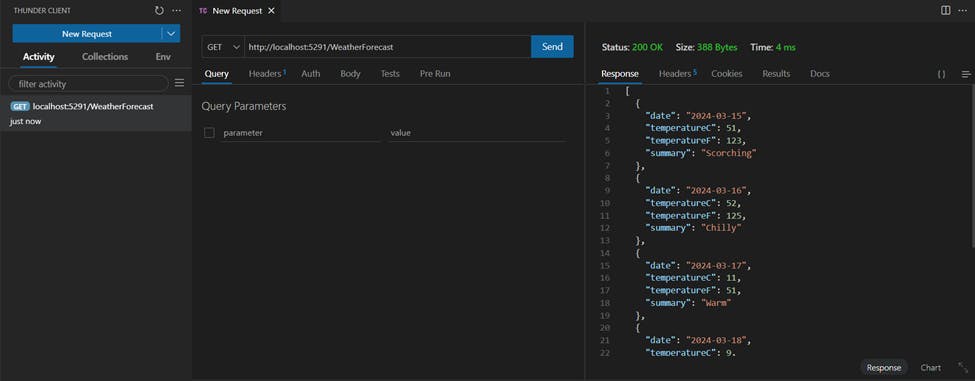
Send the Request and Analyze the Response: Once your request is configured, hit the “Send” button. The response will be displayed in a pane below, where you can review the status code, headers, and response body.
Utilize Advanced Features: Explore features like environment management for variable handling or add tests to validate responses. Organize your requests into collections for better management and collaboration.
Conclusion
Wrapping up, and diving into API development with Visual Studio Code extensions like REST Client, API-Insights, Swagger Viewer, and Thunder Client cranks up the efficiency and fun factor. These tools are like the cool gadgets of coding – they bring powerful features directly to your fingertips, making tasks like testing, documenting, and debugging APIs a breeze.
Whether you’re piecing together a .NET WebAPI project or tinkering with other web services, these extensions streamline your workflow, cutting down on the hassle of switching tools and keeping you in the zone.
With REST Client, you’re sending requests and eyeballing responses without skipping a beat. Use API insights to get a complete insight into your API (my recommendation). Swagger Viewer lets you peek at your API docs on the fly, ensuring they’re spot on. And Thunder Client? It’s your go-to for hassle-free API testing right within VS Code.
In short, these extensions aren’t just handy; they’re game-changers, making the API development process smoother, quicker, and way more enjoyable.
So, gear up with these extensions and make your API development journey a whole lot cooler and more efficient. It’s all about having the right tools in your belt – and these fit the bill.